This page explains how to work with individual records, but note that it is also possible to add a verification status to multiple records at once (see Verifying multiple records).
- Verification status buttons
- Redetermining records
- Querying records
- Contact an expert
- Editing records
- View the record page
Verification status buttons
Verification decisions are applied using the five control buttons that appear above the record details pane:
The initial ‘switch’ button, to the left of the verification controls, can be used to switch to the three ‘status 1’ verification terms, instead of the five ‘status 2’ terms – we recommend that you use the five ‘status 2’ terms if possible.

See What verifiers are asked to do for an explanation of the different status 1 and status 2 terms.
When you click on one of the verification status buttons, a window opens up to allow you to add a comment. You don’t have to add a comment every time, but it can help to explain why a record has not been accepted, or to highlight a particularly interesting record, or to thank the recorder for adding their record. (See Comments tab section for more on iRecord comments.) Some verifiers choose to add some standard text into this box to make it clear which recording scheme they are associated with, e.g.:
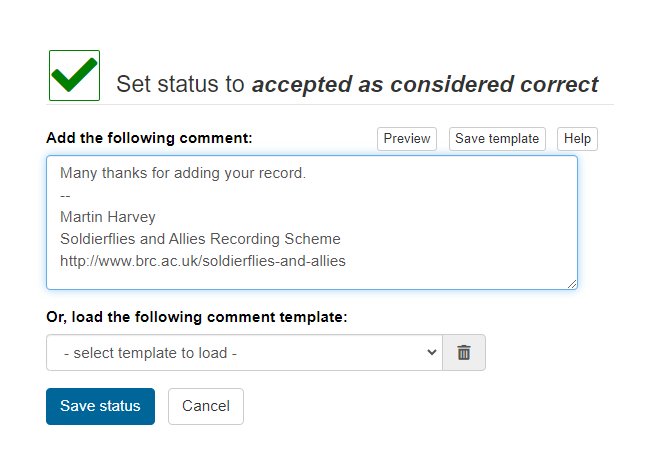
If you do not add a comment, the recorder will simply receive a notification to say that the record has been accepted or not.
Assuming that you have left the verification grid in its default view, where it only displays records that are pending verification, then once you save your verification decision the record will be removed from the grid. To see records that you have already verified you can adjust the filters, see section on Filtering records in the grid.
There are some more action buttons to the right of the verification status buttons, which are described in turn below:
Redetermining records
If the record has a photo and the recorder has misidentified it, you can redetermine the record to another species, or to a higher taxon (e.g. to genus or family level). This does not affect the verification status of unverified record; previously verified records will be reset to “Pending”.
If you redetermine to another species in your own taxonomic group the record will subsequently appear in your verification grid to be verified; if you redetermine it to a species that is outside your taxonomic group the record will be removed from your verification grid (and will appear in the grid for whoever is verifying the alternative species group on iRecord).

In the “Redetermine to” box you need to type in a taxon name and select it from the list that is offered, just as you would when entering a new record. You don’t have to add a comment, but if it is possible to provide an explanation to recorders that you are redetermining their record and let them know why that is usually greatly appreciated by the recorders. You also have the option here to save a comment as a templete to load and use for future redeterminatons.
When you click on “Apply redetermination” the record will be removed from your verification grid, and will reappear under the new taxon name after about 10–15 minutes (unless you have redetermined it into a different species group from the one you are verifiying).
In many cases, your name will be now shown as the determiner of the redetermined record, but not all record sources enable this, and some will not show a determiner name after redetermination.
Querying records
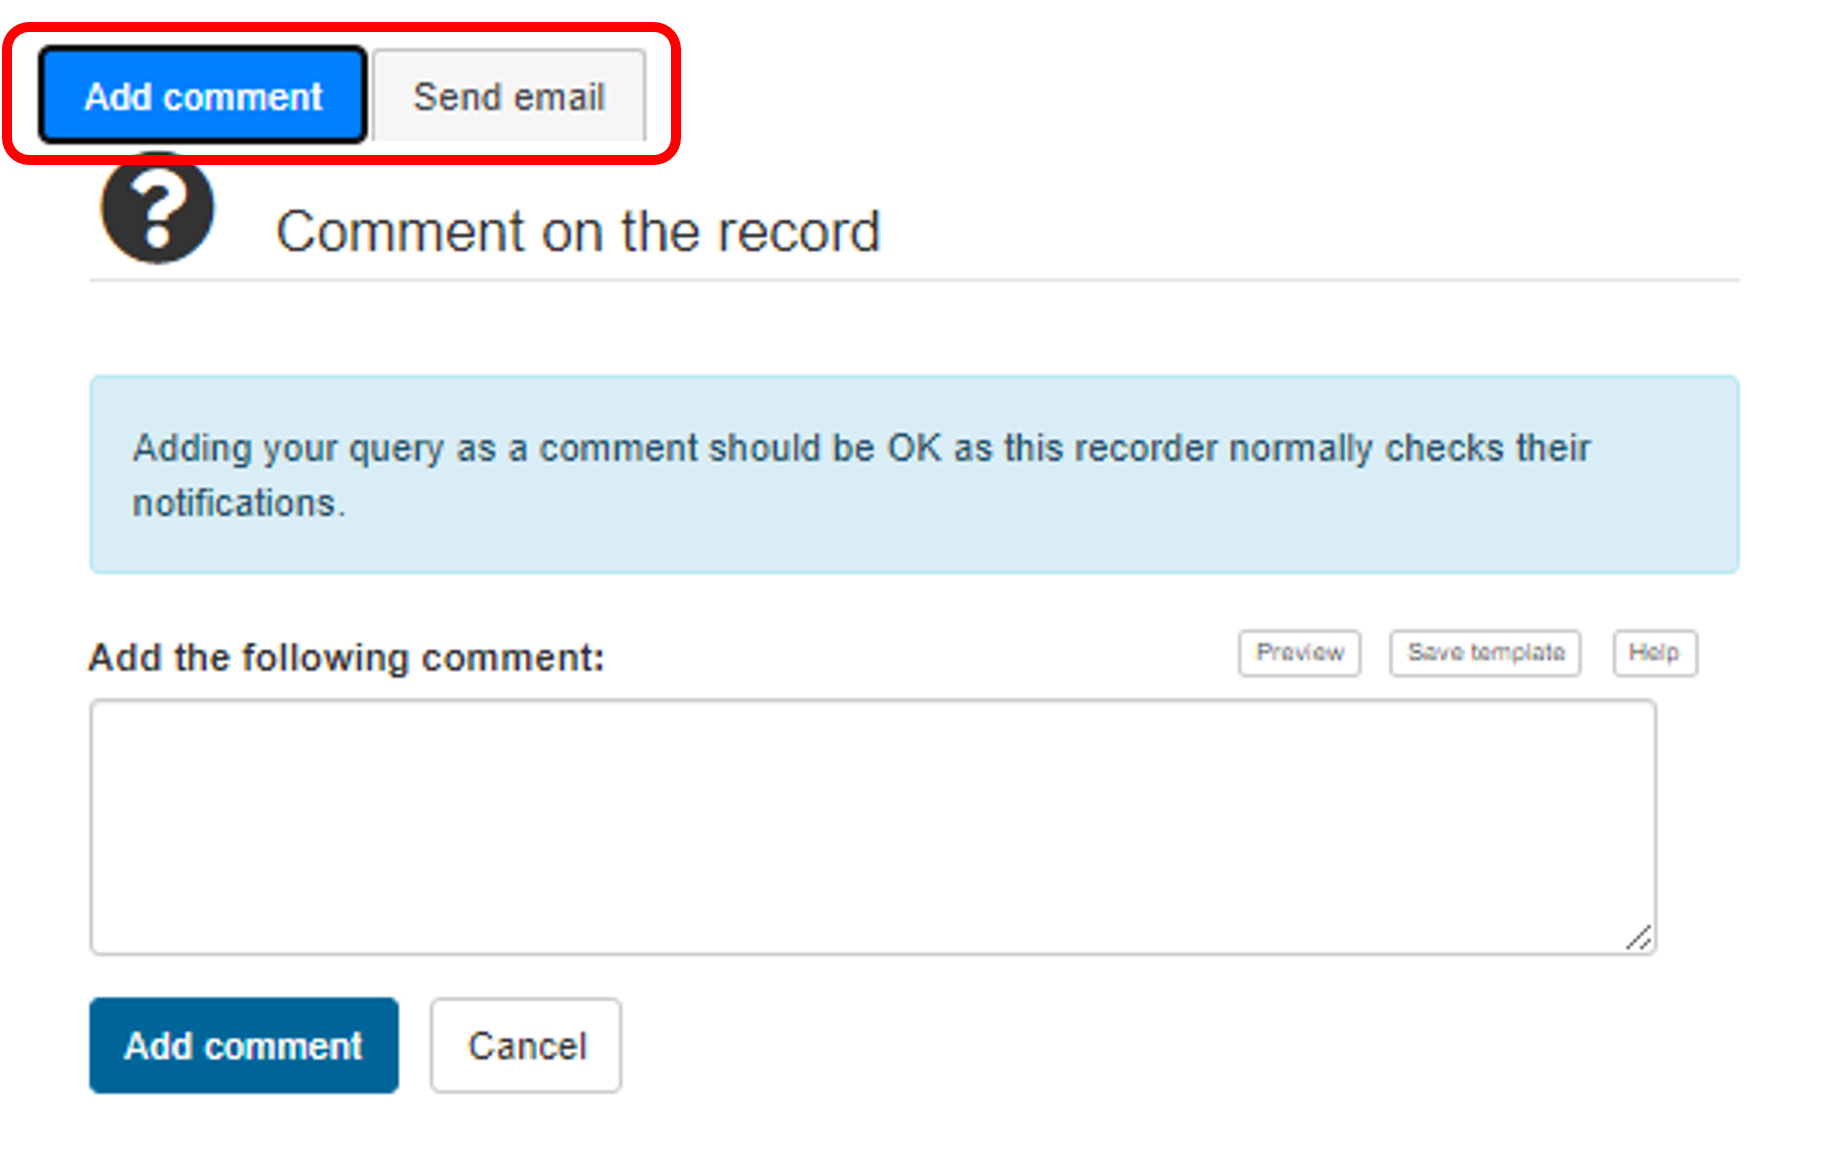
When you click the Query button a window will open that allows you to either add a comment to the record itself, or to send an email to the recorder. iRecord will tell you if the recorder is someone who is known to access their notifications, or whether it is better to send an email, but you can choose either option.
There are pros and cons to both approaches:
• Add comment
Any comment that you add here will get appended to the comments tab in the record details pane (see Comments tab). The original recorder will be alerted that a comment has been added, and hopefully they will respond by adding a further comment in response to yours. These comments are viewable by anyone looking at the record on iRecord, so are 'public', which calls for a certain amount of diplomacy if querying identifications! And personal details such as addresses or phone numbers should never be included in comments.
An advantage of using this option is that your comments are stored with the record, so that if you revisit the record after some time you can easily see what it was that you queried.
• Send email
This will provide you with a template email to send to the recorder, to which you can add any text that you wish. When this is saved it gets sent to the recorder’s registered email address, and if they reply it will come back to your own registered email address. All that gets stored in iRecord itself is a comment that says "I emailed the recorder to ask for details".
An advantage of using this option is that some people are more likely to respond to an email than to a comment, and you can then continue the conversation if needed via email in private, without clogging up the record with a whole series of comments.
Whichever option you use, the record will be flagged in iRecord as having been queried, and will be removed from the default “Pending” set of records in the verification grid. You can find previously queried records by setting the Status filter to “Queried” (see Filtering records in the grid).
Once Queried, a record will remain flagged as Queried until it is answered or until the verifier changes the verification status of the record.
Contact an expert
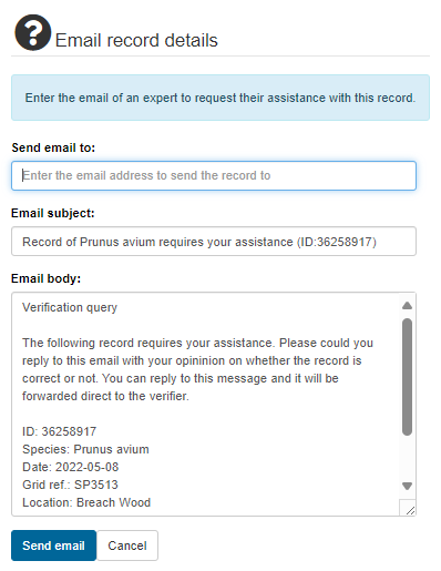
You have the option to email another expert, provided you know their email address, to ask for assistance with the verification of a record, if you are unable to come to a conclusion yourself but think that someone else may be able to.
Some standard text is provided, which gives details of the record in question (and a link to the record in iRecord) and asks the recipient for assistance by replying to the email with an opininion on whether the record is correct or not, which will be forwarded direct to the verifier. You can also edit this and add any other text.
Editing records
This needs careful thought before use, and we advise that record editing is seen as a last resort if problems cannot be resolved by querying or redetermining the record. If you do need to use the Edit button it is best to right-click and “open link in new tab” – if you use a normal left-click you will lose you place in the verification grid.
In most cases this button allows you to edit the full details of original record (but note that some record sources do not allow editing within iRecord). In many cases it will be better to ask the original recorder to do any editing that is required, but as a last resort it is possible for the verifier to edit the record, e.g. if the recorder does not respond to emails, or was not logged in to iRecord when they added the record (in which case they will not be able to edit it themselves).
Please use this option with caution, especially if the record you are editing may be part of a list of records, as any changes you make (e.g. to location names or grid refs) could change records from other species groups as well as yours.
View the record page
Another button that works best if you right-click and “open link in new tab”. This button simply opens the record in its own page, and allows you to see it as originally entered. For a few record sources no view is available within iRecord and you will see an error message if the record cannot be viewed.
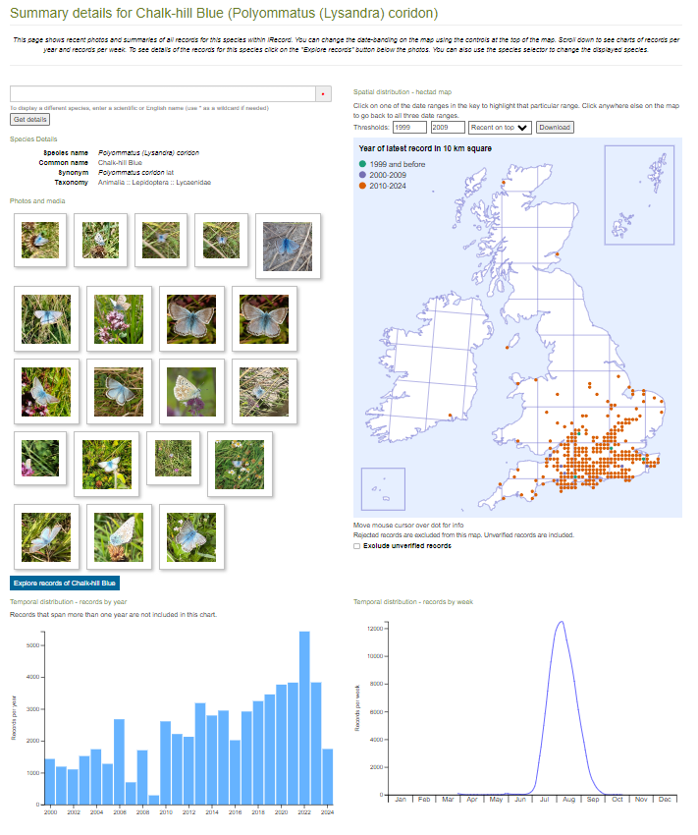
View the species page
Another button that works best if you right-click and “open link in new tab”. This button takes you to a page providing summary details for the species in question. It shows recent photos and summaries of all records for the species within iRecord. You can change the date-banding on a distribution map, scroll down to see charts of records per year and records per week, and navigate to see details of all the records for this species.