"Activities" on iRecord provide various options for joining in with recording activities and it is now possible to do so from within the iRecord App. This can be used to allow participants to contribute records to a bioblitz or local recording group for example.
How to use activities in the app
Before using the iRecord App to contribute records to any activity you first need to sign up to at least one activity that accepts records from the app as only some activities are enabled for app use. To do this, visit the Activities page and click on the Browse all activities tab to list all the available activities. The ones that are app enabled will show an app icon next to the title of the activity, as shown for the Dipterists Forum activity in the following screenshot:

Once you have found an activity you'd like to join which links to the iRecord App, click the star button and follow the usual steps to join the activity.
When you next open the iRecord App on your mobile device, click on the Activities link at the bottom of the home page:

Click on this button to access the list of your available activities:
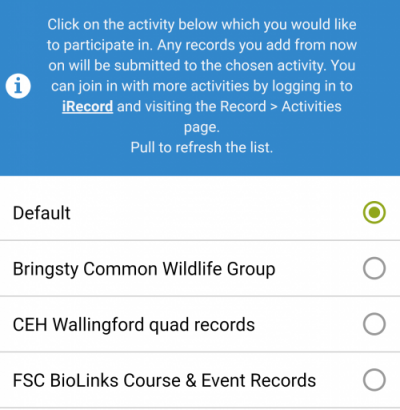
Simply select the activity you want to contribute records to and any subsequent records will be added to that activity. Don't forget to return to the Default activity when you've finished. If you have just joined an activity that you'd expect to appear and it's not appearing in the list, swipe to refresh the page and fetch your latest list of iRecord activities from the iRecord server.
How to setup your activity for use in the app
If you are the administrator of an activity (i.e. you created the activity, or the creator of an activity has made you an admin) then you must tell iRecord that your app wants to use an activity before it will be available in the app. Before reading more, familiarise yourself with how to how to setup an activity.
The iRecord App does not currently support all the different recording forms that may be linked to an activity on the iRecord website. Therefore if your activity needs to capture records in a certain format or using a special methodology it might not be appropriate to use the app to capture these records. If, however, your activity does not have any special requirements about the format of the records collated then the app is an ideal tool. In this case, you need to declare that your activity wants to accept records from the app. To do this, go to your list of activities then edit your activity by clicking the edit button in the right column:
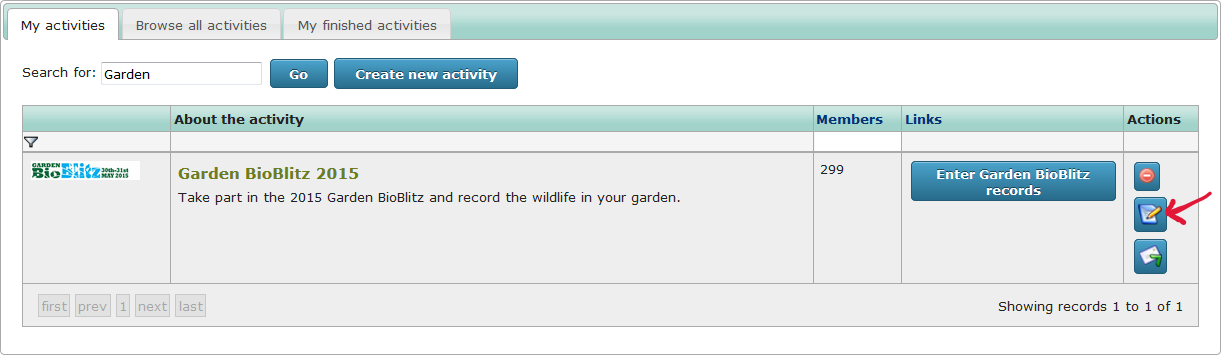
Note: if you can't see this button for the activity, it means you are not an administrator of the activity. You'll need to contact the person who organises the activity to help get this set up.
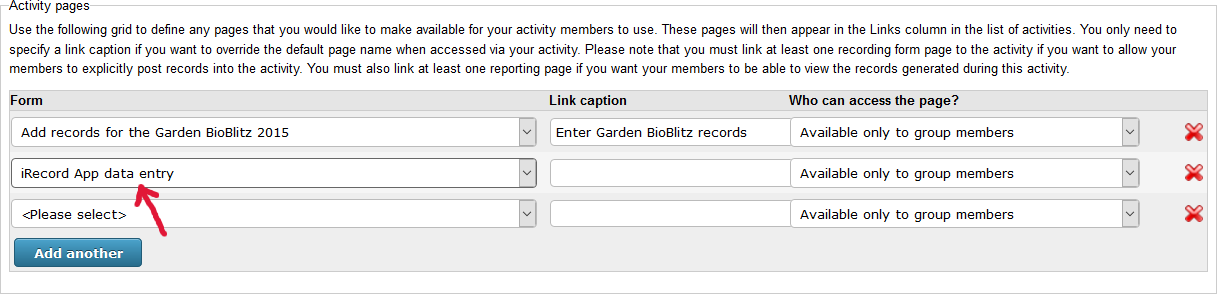
On the edit page for your activitity, to tell iRecord that you want to accept records from the app you need to link your activity you need to add the special "Edit an app record" page to the list of pages supported by your activity. Scroll down the page to the section called Activity pages then choose iRecord App data entry in the drop down in the Form column for the first spare row (which will have <Please select> shown). Click Add another if you need an extra row.
Now, simply save your activity and it will be ready to accept records from the iRecord App. Note that the Edit an app record page won't actually appear in your activity's list of buttons - this is a special page which simply enables the app, your members shouldn't need to access the page directly.